Pintrest

Monday, July 12, 2021

Freezing Beets & Their Greens

Freezing Beets
is easy peasy, and you end up with "two vegetables" to freeze, as the greens a cinch to freeze too! They make a great spinach substitute.

 I've had some helpful "criticism" lately...where is the "Farmer's Wife"? Well, I'm here still. Since we've stopped commercially farming, I've not considered my readers as interested in the farm, so I've been writing about other things. Your letters are asking about the farm, vegetable recipes, and canning advice. So, today I'll bring you alongside the Farmer's Wife and give you a glimps into my day. Prayerfully you'll be encouraged and possiblly even challenged to try something new. 

"The Lord shall open unto thee His good treasure, the heaven to give the rain unto thy land in His season, and to bless all the work of thine hand: and thou shalt lend unto many nations..."
Deuteronomy 28:12


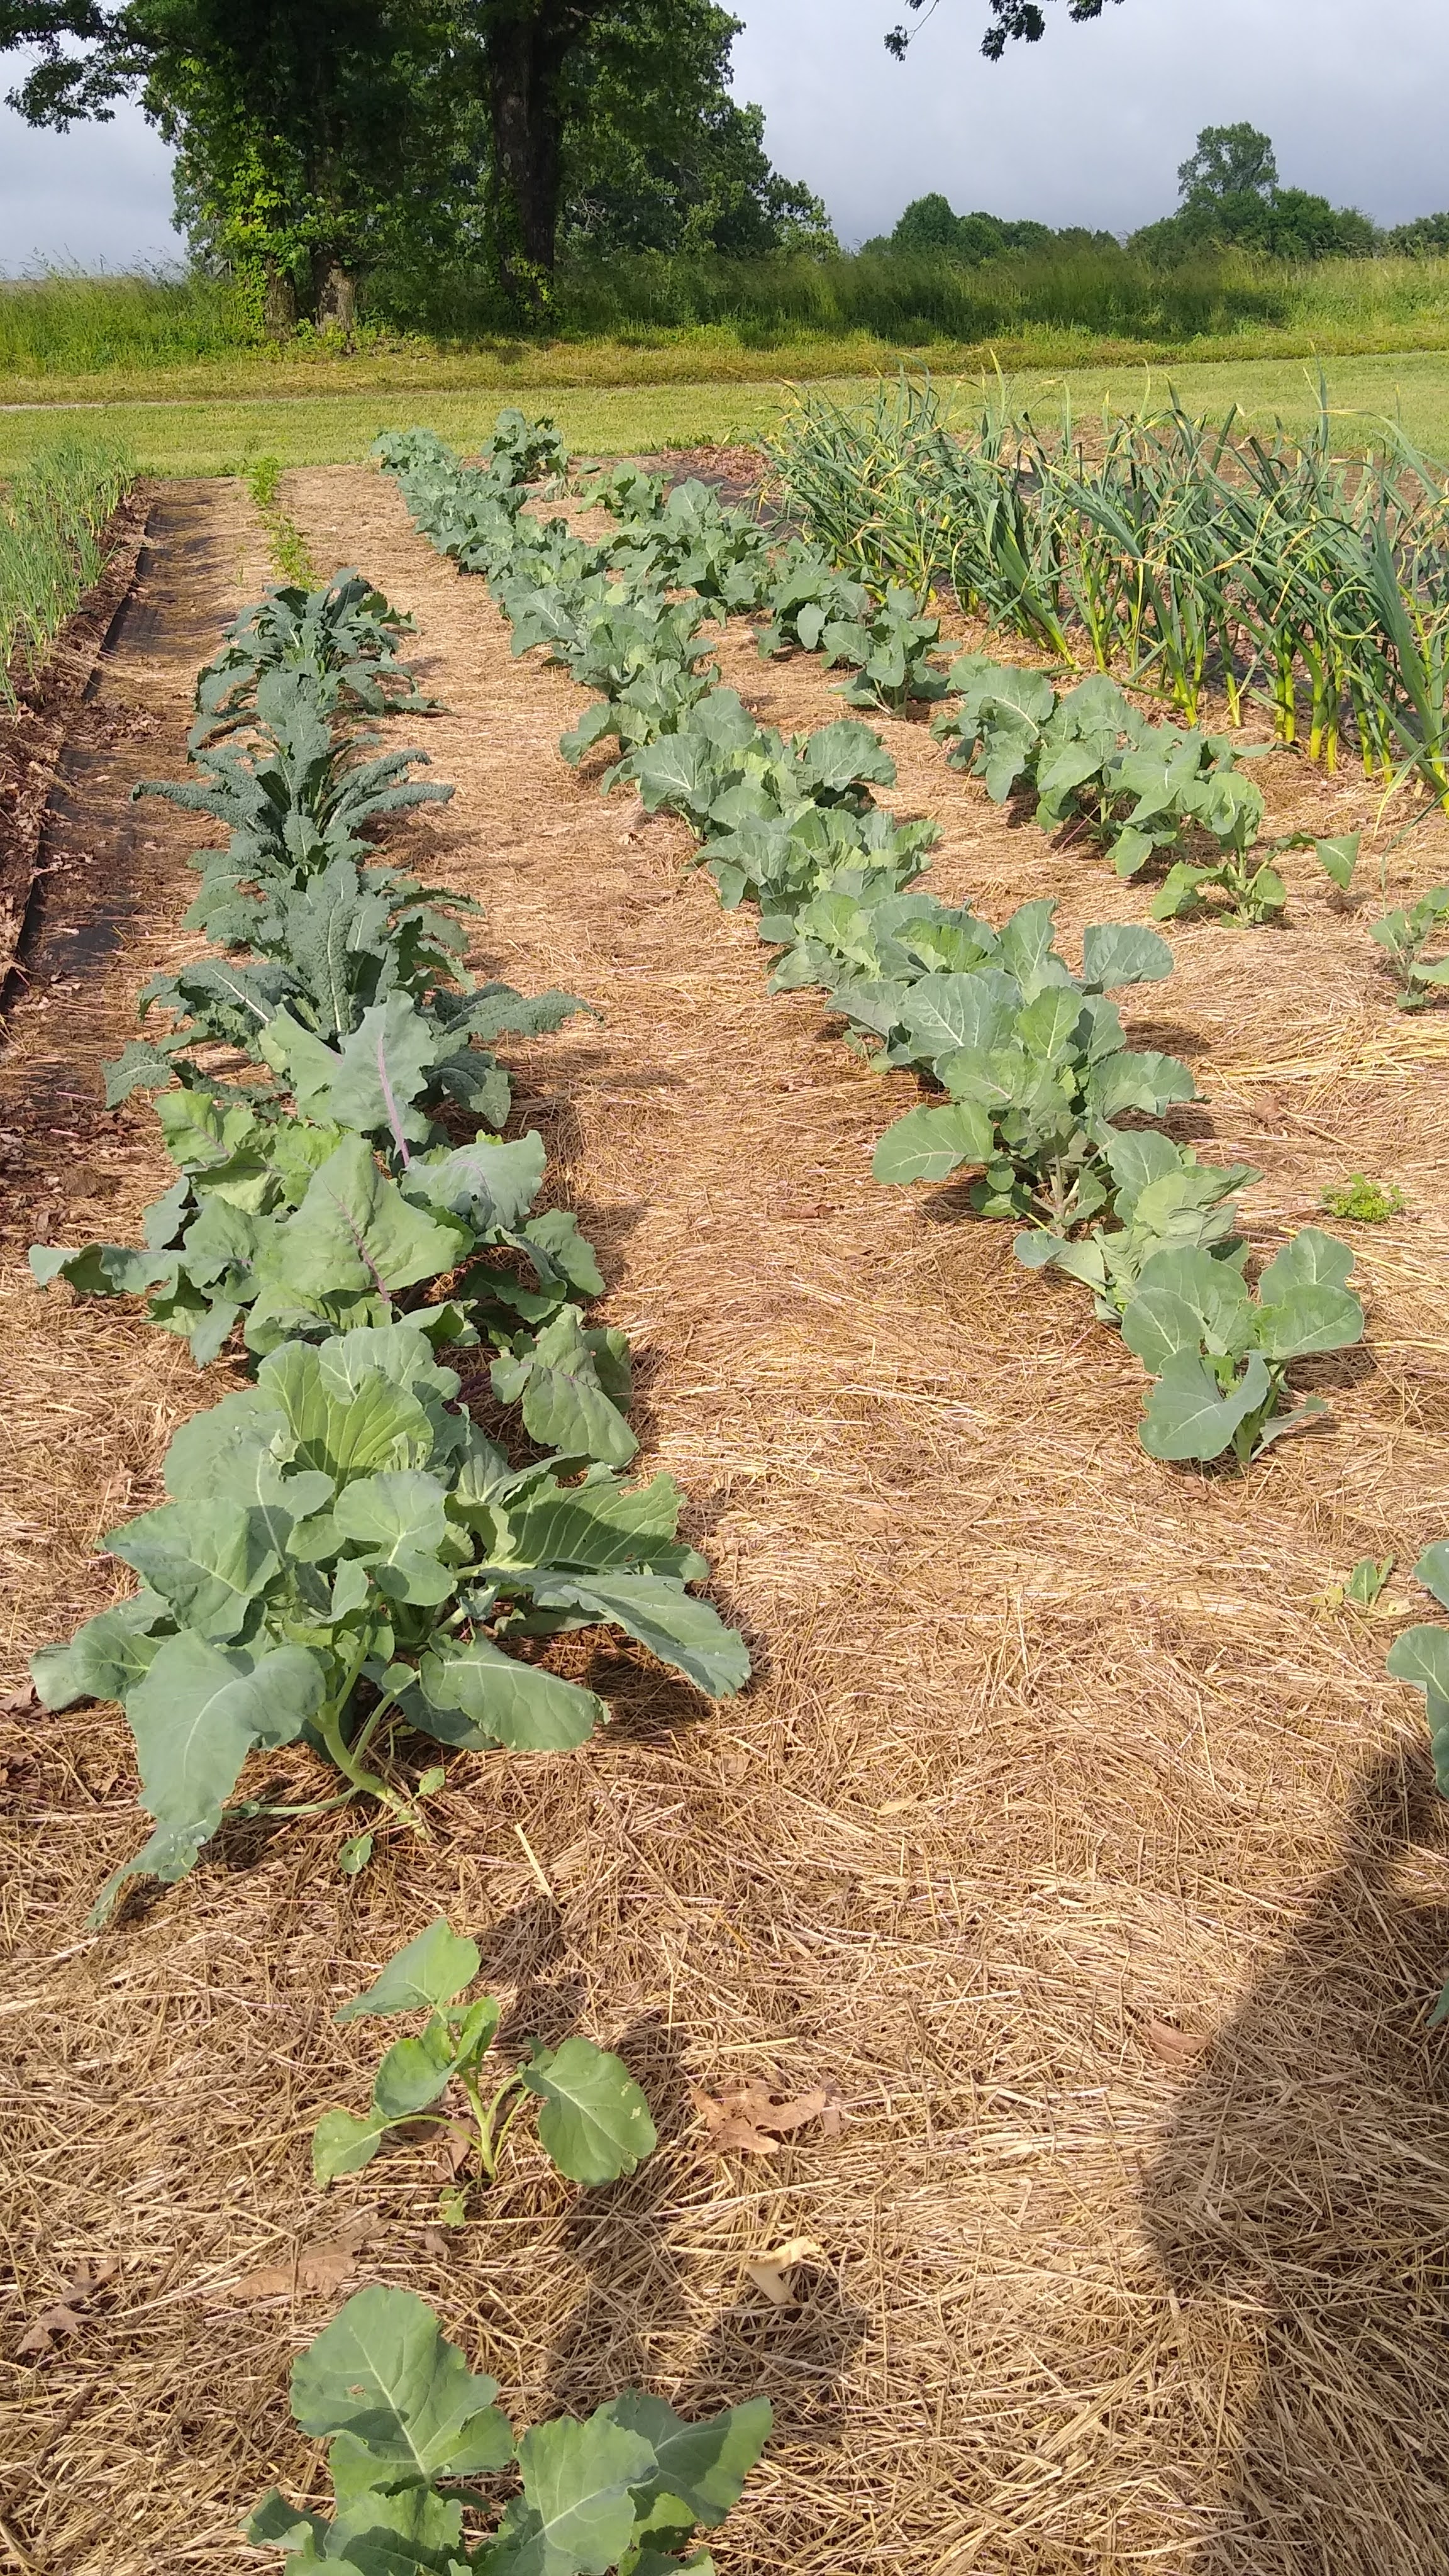
Spring gardens are now behind me, and I have the summer garden "laid by" as the mountain women used to say. I just planted my second batch of yellow squash, zucchini, and cucumber seedlings. I find succession planting these protects me from the grumblies when my first planting succumbs to the latest blight. My first

plantings do taper off, so these will pick up the slack in about a a month. I'm always thinking ahead.

(As you look at the amounts I grow and the size of my family now, don't think we're gluttens! ha ha! We still supply several families with their weekly vegetables.)


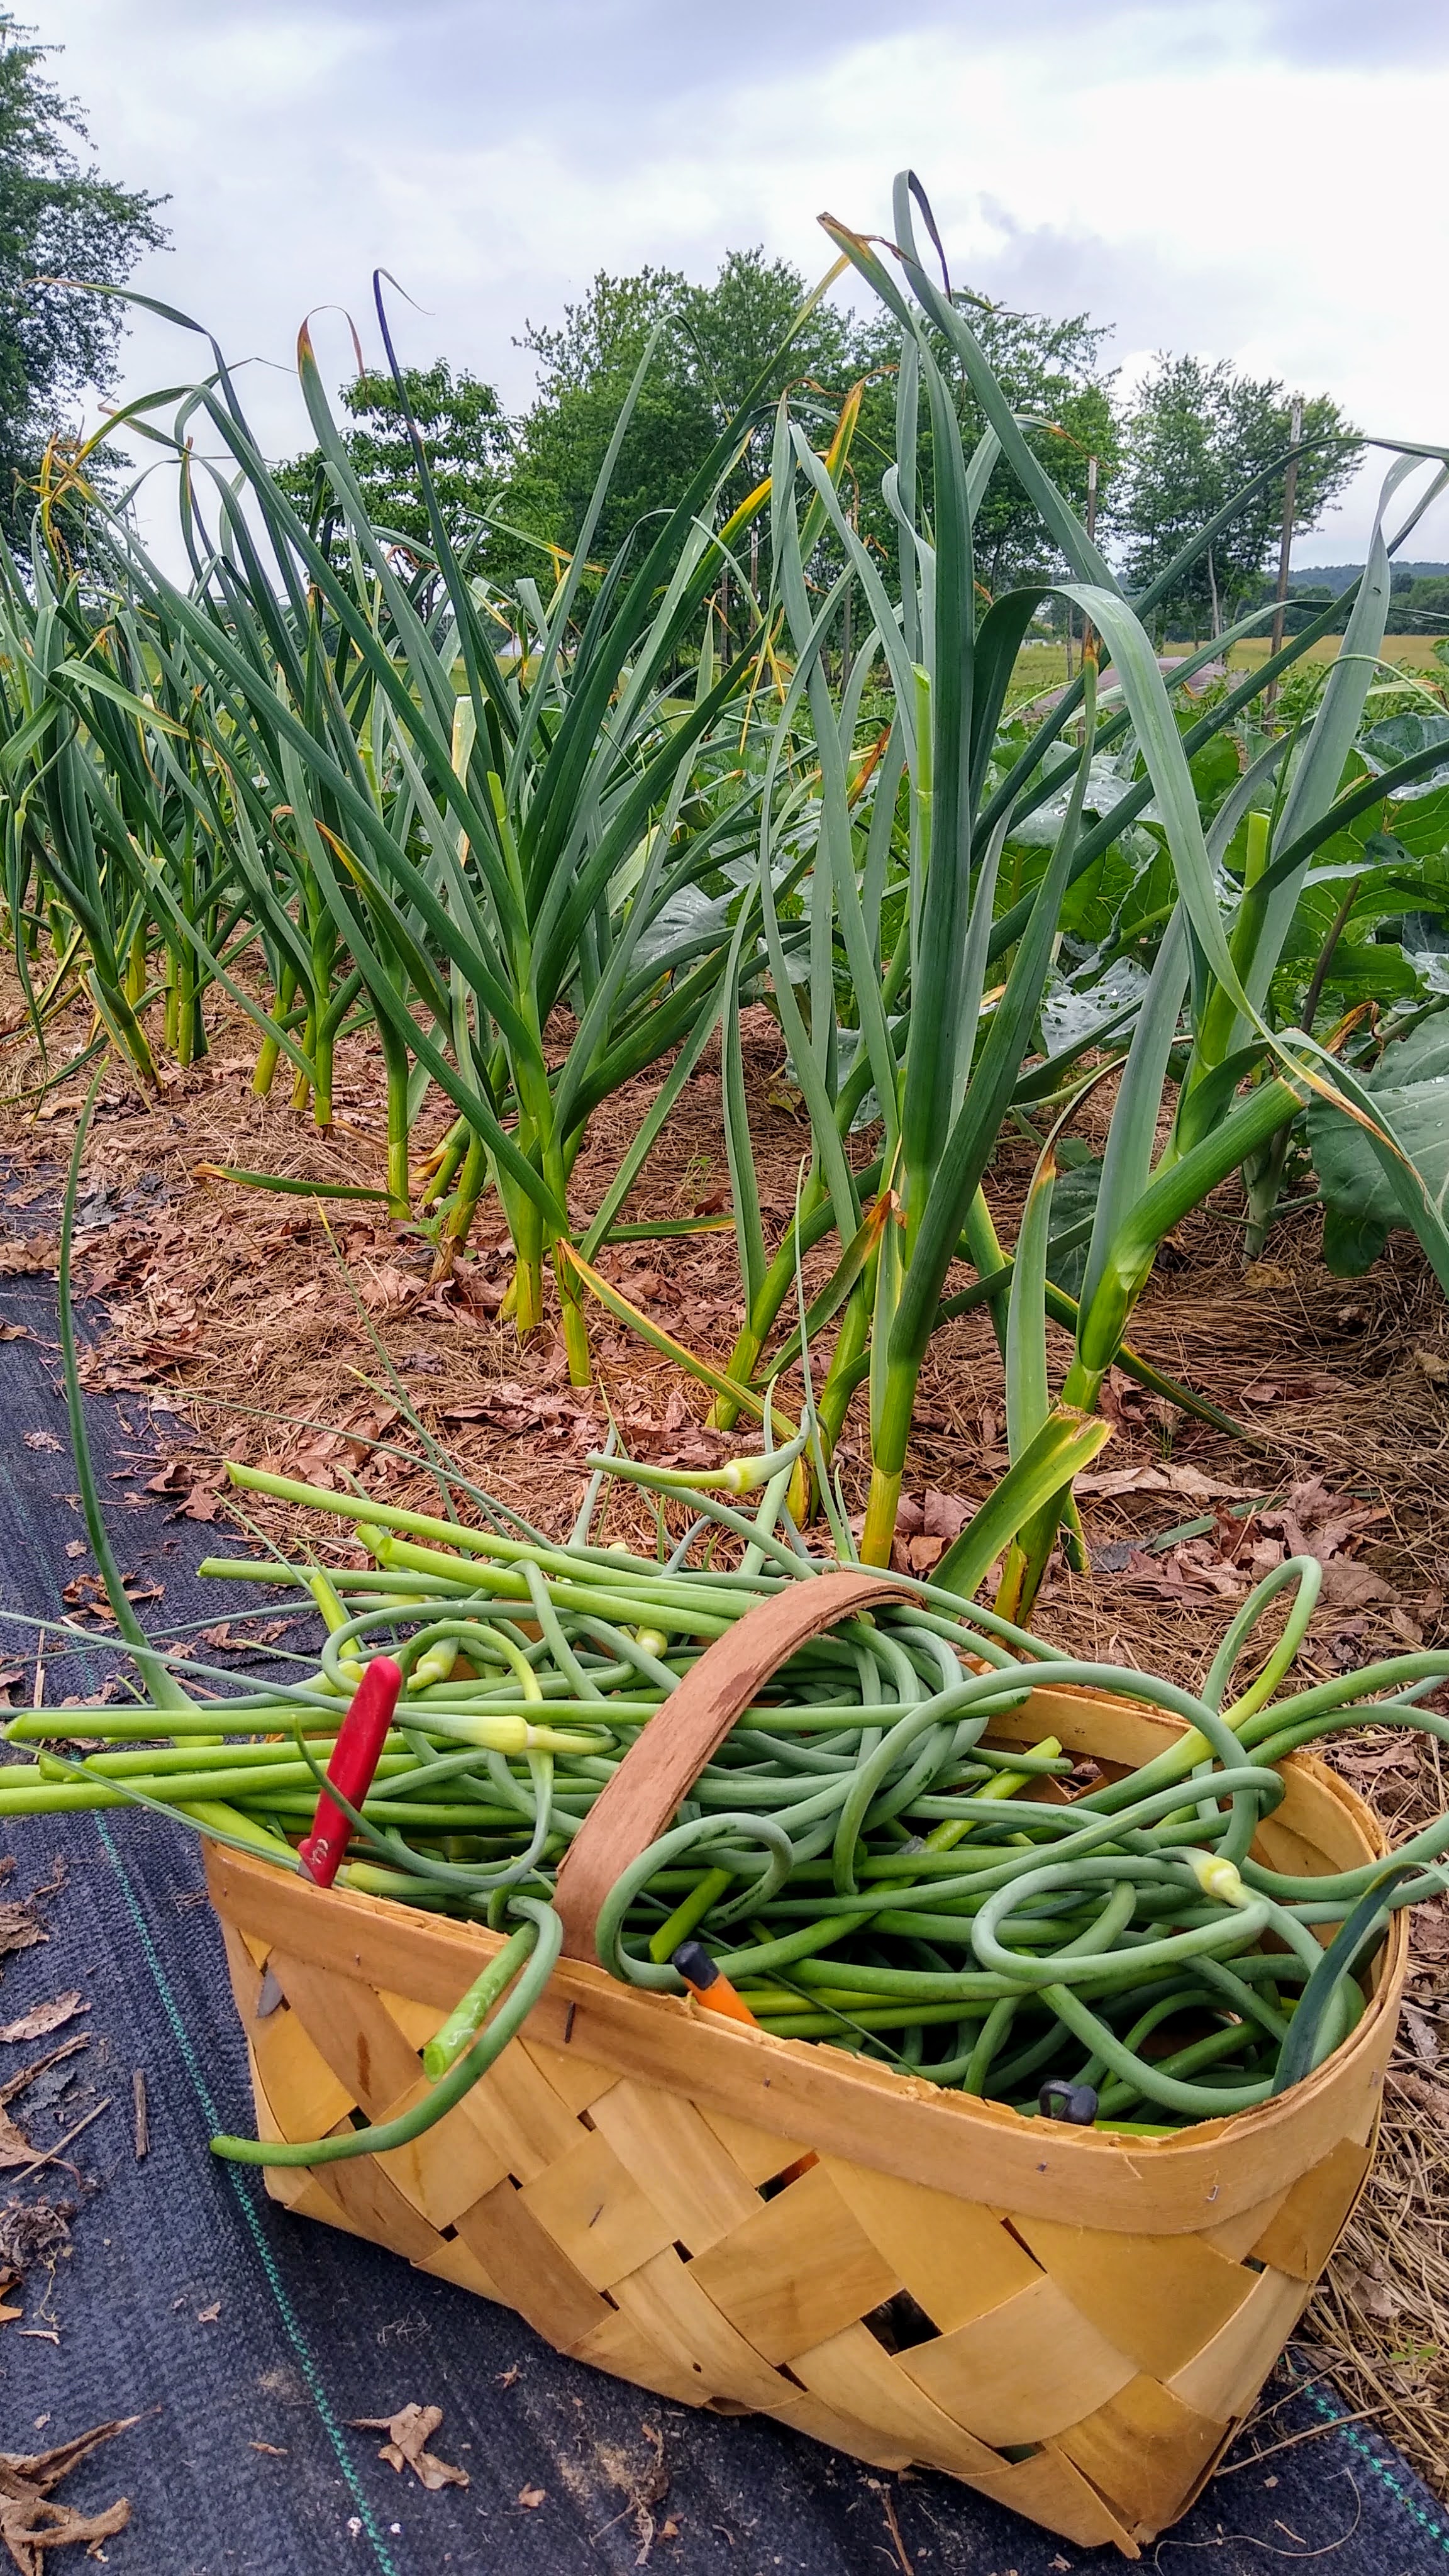
A majority of my days are spent outside in one of the gardens. I still have the canning garden, cottage kitchen garden where I plant the faster growing vegetables like beets, lettuce, peas, cucumbers and green onions in a smaller amount that I can quickly pick for our meals. Then I have a flower and herb gardens. We can't get away from the farming life.


I've harvested my spring beets, planted a few more, and am eager to plant our fall ones come mid August. My children love them as they are like serving candy for supper!


 I froze what we didn't eat or share since we goofed on making our kitchen cabinets too low over the stove. The new microwave that proudly hangs there without taking up counter space (I thought this would be a plus.) is too low for my pressure canners and larger waterbath canner....so before long we'll be moving it! 

These are Detroit Dark Red and  Golden Beets.

Beets are a great vegetable to eat fresh. I grew up with canned beets that were definitely not my favorite vegetable to get when sent to the cellar. These are more like serving candy to my children! They loved them and even ate the leftovers cold for snacks.

Beets are a double win vegetable. You can can/dry/freeze the beet itself and also do the same with the greens. 

Beet Root
 Instant Pot: Manuel 15 minutes with about a cup of water. Fill with beet root up to the full line. Set a timer for about 25 minutes and then I went outside to work on the greens. I kept going back inside to
pour off the steaming hot water carefully and dump the beets into a dish pan/sink of ice cold water. 


Then slip the skin off. Sometimes you'll have to cut a line in your beet to help the skin come off. These came off real simply! :)
Not all my beets were big beauties, but these smaller ones were just as tastey. I remember serving this size to my toddlers as they made for great finger food.


Some beets have "dents" and other imperfections. I know you don't see beets oddly shaped at the market, but these are just fine to eat. I just made a diagonal cut into the beet to cut any imperfection away. 


Next, simply slice the larger beets and lay them in a single layer on a baking sheet covered with parchment if you have it. 


Lay your trays in your freezer until well frozen. I kept mine in here overnight. The next day I pulled the parchement up and slid the beets into half gallon freezer bags. Now I can pull out just what we need for a meal instead of having a big frozen clump.


Beet Greens


I have an "unothredox" method that really saves time when blanching greens. I use two old pillow cases as blanching bags. This saves chasing chopped greens around in your blanching pot. Here I just took thumb tacks/push pins and tacked it down to my garden table. I then set my cutting board  on top of the edge.


Since I have two different kinds of beets, my greens will vary in color and texture.


Not all the beet greens are good for eating though. The Detroit Dark greens on the left are deep green. The second one from the left is a healthy Golden Beet top. But you can see the lighter greens and even the bug eaten green to the right were discarded. You can tell the health of your plants by the leaf color and quality...as I worked my greens I discarded any unhealthy ones to the compost bucket.


Chop your greens acrose the leaf, working your way toward the stems. Since I'll be using these greens in recipes that traditionally call for frozen spinach this year, I cut the long stems off and composted them. 


Next, make a  lengthwise cut or two. Then I scraped them into my blanching bag. 


When I had all my greens chopped and in the bags I headed inside to blanch them and finish up the slicing of the beets.


I poured the greens from one bag into a large dishpan and left only enough that would fit with "wiggle room" into my smaller waterbath canner. Using a wooden spoon, I made sure the greens were under the water and separated a bit.

For safety sake, TUCK THE END OF YOUR BLANCHING BAG (PILLOW CASE) INTO THE HANDLE OF THE POT SO IT DOESN'T CATCH ON FIRE.


I set my timer for three minutes. (Yes, I know that you "should" start timing when the water boils again, but I find that it overcooks the vegetables. This timing has worked for years with alllll kinds of vegetables and I still retain the highest level of vitamins.)


Canning/freezing doesn't have to be a big mess. Use the spare moments you have to either continue the process (I was freezing the beets too.) or clean up equipment. (Okay Cerina...IF you are canning/freezing a LARGE amount, plan for it to get MESSY. As you repeat the process OVER AND OVER for your larger family the floor wiiillll get gross. Put old towels on the "path" you take from the stove to the sink to keep things safe. Hint: Ask a friend to come and help as it's better to laugh over the mountains of greens rather than cry...and maybe she'll do the dishes!:)


A peek inside the pot.

When the 3 minute timer goes off, hold the blanching bag up above the boiling water. Let it drip a bit, and then place it on the underneath side of the lid to the pot. This will slow the drips down as you take it to the sink. 


Place the blanching bag into a dishpan/clean sink filled with ice cold water. Swirl the greens with you spoon again allowing them to cool.


I then place the dripping blanching bag into my dish rack to finish dripping. I can actually press on the bag to remove the water QUICKLY from the greens. Then I put the next batch in with the other bag. While that bag blanches, I can bag these!

Looking at these pictures now a couple of weeks later, I see I really had spinach greens on my mind! I labeled the bags that way!


Get as much air out of the bags as possible...no you don't NEED a vacuume sealer. It may be better, but you don't have to spend a lot to put up a harvest. Remember those folks selling all the latest (now the freeze driers) are making their living that way and are selling you  something. (One of my favorite bloggers is really having fun with her freeze drier and is pushing them. But SHE DIDN'T SPEND A COUPLE OF THOUSAND DOLLARS ON HERS!)

Lay your bags flat on a cookie sheet or other flat frozen item so they will save space in your freezer this winter. (If it looks like it's going to slide...it WILL! So secure your stack.)

Aren't my lil' bags cute? This is our first year to use quart bags. I've been using gallon or even two gallon bags with our large family for so long! 


So, the Farmer's Wife has shared how to put up the harvest....now to share a recipe that didn't go so well to show you EVERYBODY has some recipes that just don't "hit a home run".


My yellow squash is coming in "hot and heavy" so I'm always looking for a creative way to use what God puts in my hands. 

A Google article raved over the "golden way" to use summer squash that everyone was raving about. (That should have been a warning to me right there!) Squash Butter! Supposedly the famed late Julia Child (the Public TV chef of my childhood) had made something similar...yahhh. 

I don't do anything small so I jumped in and made a 4X batch to begin with...The first batch came out brown instead of golden. I was having fun though and wasn't going to let Google snooker me! 


Our German Giant garlic harvest was huge and is a dream to work with.


By this time the house was smelling WONDERFUL with our freshly pulled Walla Walla onions and green garlic sauteing in the cast iron pan. (They reccommended a non-stick pan. My cast iron pans are non-stick if I heat it well.)


I sauted the onions and garlic till the house smelled DEVINE
before adding the grated squash.


My first batch yeilded a measly 3 half pints and was a disagreeable looking brown. 
(I'm saving peanut butter and Parmesan cheese lids now to use to freeze to save my precious canning flats!)


Not to be bested by Google, I set my sights on a beautiful golden Squash Butter that the article had inspired. I put on my thinking cap and geared up for SUCCESS! I set out with a heafty 5X batch, and I stood over the pans stirring/scraping OFTEN. I used large pizza pans as lids to help steam the squash rather than "fry it" as the recipe described. Then I used an immersion blender to get the smooth paste before cooking it down a bit more. It was MUCH better looking and tasting, but it was still....just ok for all that work. (The Farmer said it just tasted like garlicy squash...with "that look" on his face.)  I think the whole family liked the smell of the house more than the little bits of artisan bread with Squash Butter on it. I'll use it in an artisan bread this winter, but I'll not make another batch. Lesson learned...CANNER BEWARE of Internet recipes. 
My second batch wasn't much better...but it was yellow!


So as you can see I too am learning after 40 years of canning. But....it is fun to try something new! 


Abundant Blessings,
The Farmer's Wife
Val


P.S. If you've gotten this far, I assume you are interested in this blog. Nowadays blogs are connected to social media. I am not on any social media, so I'm counting on ya'll to pass on the information for others to connect with me. We've always believed word of mouth advertising is the best advertising. So you have my permission to use the photos in the blog to link with my address. Blogger is an "antique" so to speak and the email notifications and tec support are now gone. Thank you!

Wednesday, June 16, 2021

A New-To-Me Pesto!


I've been enocuraged lately to share more regularly on my blog. I covet your prayers on this as I'm not the best on the computer and it takes me days to post one blog. I know in the past I've written my posts much too long, compounding the problem. I've been praying for solutions for these hurdles and the Lord has been directing me to to post two blogs posted each month. One will be a message from my heart, while the other will be a more hands-on post. I'll prayerfully keep each short and sweet. 

You can use garlic cloves for these recipes, but I was challenged by a large basket of garlic scapes I cut from my garden.


 If you've planted (or want to learn) garlic, you do so in the fall. I won't get deeply into the subject, as you can read all about it online. The bulbs do though come up slightly in the fall and early winter. I mulched mine with hay at this point to protect them from our nasty winter. 

By spring people were stopping beside the garden to comment on my huge onions...I had to explain a few times that the onions were still small and that what they were looking at was my garlic.

Above you'll see a curly outgrowth with a bulb forming at the tip. This is called a garlic scape. It must be removed so the plant will concentrate its growth to the bulb growing in the ground.

I don't waste these scapes but use them to flavor the abundant greens that are growing about the same time! They can be used in any recipe calling for garlic or green onions.

These are garlic scapes.


 This season I heard someone mention kale pesto. Now, I've made the usual basil pesto and even carrot top pesto, but I've never made kale pesto before! I love a garden challenge so I looked at my pesto recipe and went to work converting it.  Then I went on an online search to see how others handled the texture difference with kale versus basil. I learned that by blanching the kale, the fibers are broken down and it is easily processed into pesto! 

On our farm we've always called this Dino Kale. It's a heartier veriety of kale that is good for soups, stir frying, or kale chips. This is the veriety I used for my pesto. Frilly kale could also be used; just measure 1 1/2 cups of chopped greens before blanching.


Since I'll not harvest my garlic until it dies back in early summer, I used my garlic scapes to make my pesto. Just a handy piece of information for you... Google said, "4-6 garlic scapes are equal to the flavor of one clove of garlic. " I found this to be toooo strong with my scapes, so I used 6 scapes in the place of 3 cloves of garlic and it was still quite strong...one can't always trust online resources....so check yourself as you make this! 


When preparing the scapes, cut just below the bulb where the light yellow turns to green. Then cutting the scapes feels very similar to cutting up asparagus. When your knife meets resistance, stop cutting as it is too fiberous. Compost the bulb and fiberous ends.


 "12" Lacinato Kale leaves, ribs removed 

3 Cloves Garlic/5-6 Garlic Scapes

3 T. Lightly Roasted Walnuts

1/2 teaspoon Lemon Zest

2/3 C. Parmesan Cheese (green shaker ok)

1/4 C. Extra Virgin Olive Oil

Sea Salt & Pepper to taste

Pinch of Chili Flakes (optional)

Cut the tough stem/rib off the leaves.

Don't just toss these ribs! Bring them to the chickens, add them to your collection of vegetable scraps to make a broth, or at least compost them. 

The recipe calls for "12" ribs. When you harvest for this recipe, keep this in mind. If you're like me, count two for one if need be. 

1. Preheat the oven to 350 degrees. Roughly chop
walnuts and place on a cookie sheet. Lightly toast till they are golden, aproximately 7 minutes.


2. In a Dutch oven boil water to blanch prepared kale for 2-3 minutes.

 Cool in  cold water.

Drain


Finally squeeze the liquid out.


2. In a food processor combine the first 5 ingredients. Let process until the mixture is chopped. Drizzle in the olive oil. (This is not a technical process. Just combine and add the oil.)


3. Taste test as you add the salt, pepper, and chili flakes. Adjust texture with olive oil till it processes smooth.

(I don't use a bunch of fancy ingredients.)


4. Spoon into a small jar (I use Ball 1/2 pint jars). Leave a good 1/2" plus at the top if you plan to freeze your pesto. Press into the jar, removing air spaces. 


5. Pour a thin layer of Olive Oil over the pesto to preserve it from air. Wipe the rim of your jars with a paper towel or kitchen cloth. Cover with a flat and band, or a one piece lid.


Store you pesto in the refrigerator. Each time you use some, replace the olive oil over the top to preserve it. 

If you are freezing your pesto, do not tighten your band or lid tightly. If the pesto expands beyond the rim it will break a jar. I freeze mine with the lids on lightly, then tighten my lids once they've frozen solid. 


1 1/2 C. Basil leaves (NO stem removal or blanching                                   like with the kale recipe)

3 Clove or 4-6 Scapes of Garlic

3 Tablespoons Lightly Toasted Walnuts

1/4 C. Extra Virgin Olive Oil

1/4 C. Grated Parmesan Cheese (green shaker ok)

1/2 Teaspoon Salt

Heavy Sprinkle of Coarse Ground Pepper (but use what you have)

1. Place all the ingredients but the olive oil in a food processer. Whiz till chopped.

2. Drizzle olive oil in spout of processer as it runs, combining the ingredients into a smooth paste. 

3. Spoon into jars, leaving a heavy 1/2" space at the top if you are freezing your bounty. 

4. Drizzle a thin layer of olive oil over the pesto to preserve it. 

5. Wipe the rims, place the lids on lightly if you are freezing or store in the refrigerator. Replace the layer of oil after each use. 


Use ths with pasta, Spaghetti Squash, or other grains...or my favorite is to slather a small amount on warm sourdough bread! ( I know, I know...that's a fat and a carb...but a yummy Trim Healthy Mamma crossover!)

To use with pasta, reserve a small amount of the water that you boil the noodles in before draining. (THM use Dreamfields Pasta!) Place your pasta in a serving bowl and add a good spoonful of pesto (either recipe) into your noodles. Splash in a little of the reserved water and stir. Repeat until you get the taste and texture you want. Enjoy!

A few of our boys pose by our garlic harvest.


Many write me that they enjoy following my blog because I challenge them to try new things, or that the blog encouraged them in a spiritual struggle they were having. Some like the pictures of farm life...so to all of you, enjoy my lil' "What's Happening Around our Farmstead" section below. 

If you missed my letter back to my younger self earlier this month, check that post out! You may learn something from my weaknesses and mistakes as a Momma to 13 children.


This is 1/3 of our canning garden. We're working smarter this year (prayerfully!) and are trying different planting methods.


A mild spinach/mustard


Storage onions

We've had some rain, so this cauliflower is now much bigger. It amazes me how much better rain is than our irrigation!


8-Ball is my favorite kind of zucchini as I like to make vegetable pizzas with it! 

We'll be picking our first squash tomorrow!

Swiss Chard is our number one favorite green. It grows in all four seasons! Substitute it for spinach in any recipe, stir fry it, stuff it, steam it...Do a search on this website for recipes using this, or any vegetable.


Our first strawberries were hit with frost...3 times! More are coming on, but we have big hopes for next year. 


These are where my big hopes lie...I got my 25 strawberry plants from planting the runners off of a half dozen plants. I planted the runners last fall into this tidy row (not so tidy now) and I'm potting the runners off these. Lord willing, my strawberry patch will be bigger and better in 2022!

I put potting media into my collection of small pots and stick runners that are putting down roots into these pots. As of 6/16 they are still connected to the parent plant, but I'll snip them as soon as they are established. I've outgrown a pot between each plant and will be putting more new pots out this week! When a single 4" pot of A strawberry plant goes for $18.99, you can eaisly see the cost savings here!

Our Raspberries are a super sweet treat after working in the garden.


              This is my favorite veriety named Anne.

Hay mulch makes the garden sooo much easier to manage!


These radish were raised in the cottage garden. There we have eight raised beds for growing small amounts of vegetables. Lettuce, green onions, snap peas, kholrabi, mixed greens, cucumbers, beets, etc. I can visit this tranquil spot for fresh veggies for supper!

Aunt May's Butterhead lettuce

I keep a jar of green onions in the door of the refrigerator all season long. 


I had to include this...our asparagus that is now in fronds. 

We've had two MAJOR rainbows this week...on a day I really needed the message of hope it brought !
It "began" in our cottage kitchen garden and ended in the field across the street.


This is our second year on our new "farmstead". I'm not only growing herbs, I'm challenging myself to use them in new ways.


 I've also been drying calendula, rose petals, chammomile, mullen, and parsley. I'm preparring chammomile and rose hip oils to make a face cream.


           Calendula Oil


 I've enjoyed picking the enticingly fruity smelling chammomile for tea too! It's so fun to try new things. I'm thankful that the Lord is always showing me something new when I bend down to pick or weed the herb bed!


Milkweed


Calendula with Valerian in the background


I don't break our salads up as the greens start aging quicker once I do. Instead I just put out a bowl of greens and everyone breaks their own salads...a time saver too!


Our second rainbow was a breath-taking double rainbow with full arches. (Sorry I couldn't capture the whole thing...even with laying down in the street!)


Steve replaced tires on yet another tractor from our farming days. It is for sale...along with 7 others! Anyone interested!!??


We share cooking days around here to give everyone a chance to serve. Mondays are one of my days, and I enjoy grocery shopping in the garden along with my many jars of food we put up last year. 

   I harvested two kinds of beets along with their lush greens for our supper. 

 
Chammomile for tea
          Lavendar


We have canning tomatoes, brussels sprouts, pumpkins, winter squash and late kale ready to go out next week. We've been experimenting with a grow light along with our usual shop lights (LED) and find that you don't have to pay the additional expense of the grow lights. We've never had one all these years, and we didn't miss out...
really.


I started sprouting these sweet potatoes in March. I've been snapping the sprouts off and placing them in water to root for a few weeks.


I also ordered 50 Merlin Sweet Potatoes from Johnny's Select Seeds the week I started sprouting my potatoes. They were delivered last week. On Monday we planted them all...probably close to 75 plants. If possible I'd like to have quality potatoes to sprout from my own harvest next year. 


There are a lot of projects going on here that I'll be sharing over the coming months along with the messages that the Lord lays on my heart. He teaches me first before I share! May God bless you as you serve Him in your home.

Abundant Blessings,
The Farmer's Wife
Val